Dynamic 3D measurement error compensation technology based on phase-shifting and fringe projection
doi: 10.37188/CO.EN.2022-0004
-
摘要:
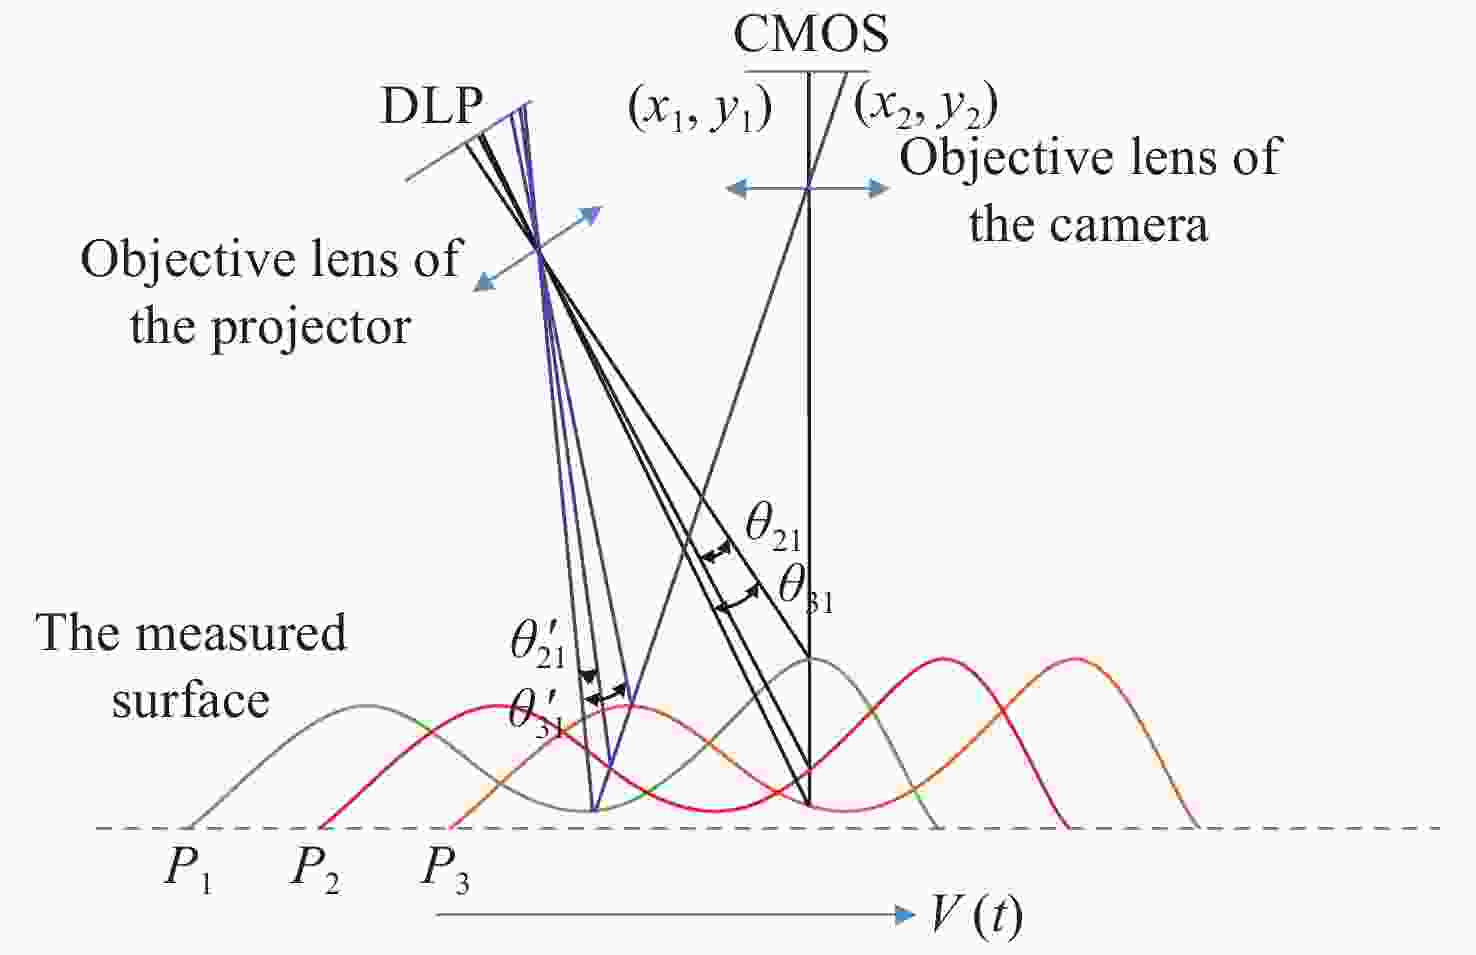
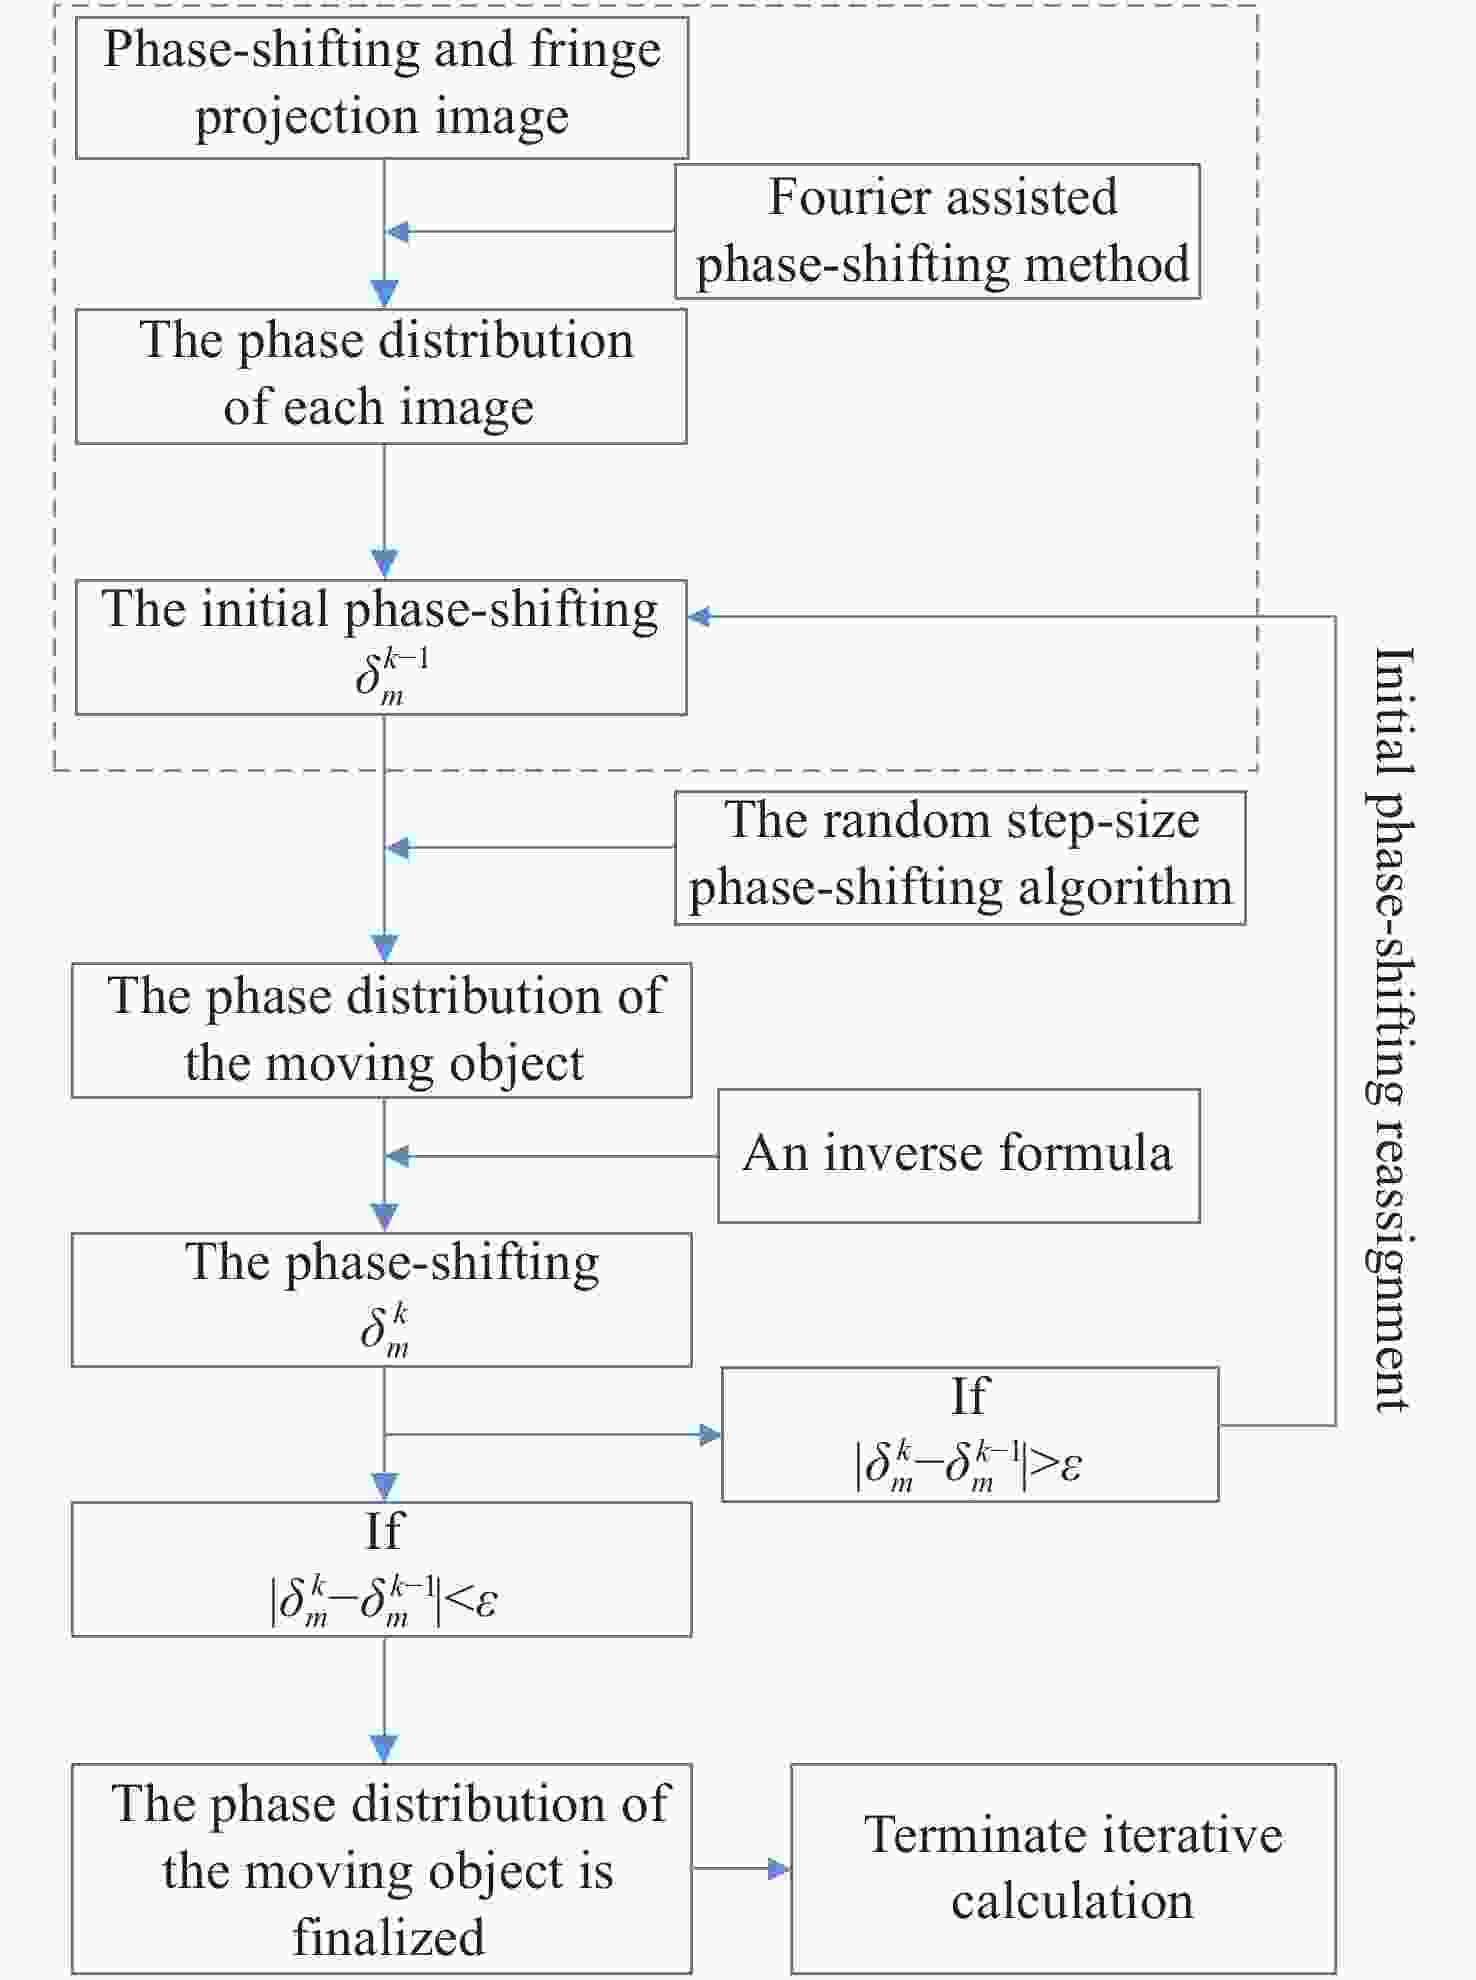
在基于相移条纹投影的动态三维测量中,不同条纹图像中物点、像点和相位之间的理想对应关系被破坏,此时应用传统的相位公式会产生很大的测量误差。为了减小动态三维测量误差,首先分析了该误差的基本原理,并将该误差等效为不同条纹图像之间的相移误差;然后,提出了一种动态三维测量误差补偿方法,该方法将基于最小二乘的先进迭代算法和改进的傅立叶辅助相移法相结合,实现了随机步长相移量和相位的高精度计算。对精加工铝板的实测结果表明,动态三维测量误差补偿技术可使动态三维测量的均方误差降低一个以上数量级,补偿后的动态三维测量精度可达0.15 mm 以上。
Abstract:In the process of dynamic 3D measurement based on phase-shifting and fringe projection, the ideal correspondence between object points, image points and phases in different fringe images is destroyed. On this condition, the application of traditional phase formulas will cause significant measurement errors. In order to reduce the dynamic 3D measurement error, the basic principle of the error is firstly analyzed, and the errors are equivalent to the phase-shifting errors between different fringe images. Then, a dynamic 3D measurement error compensation method is proposed, and this method combines the advanced iterative algorithm based on least squares and the improved Fourier assisted phase-shifting method to realize the high-precision calculation of random step-size phase-shifting and phase. The actual measurement results of a precision ground aluminum plate show that the dynamic 3D measurement error compensation technology can reduce the mean square errors of dynamic 3D measurement by more than one order of magnitude, and the dynamic 3D measurement accuracy after compensation can be better than 0.15mm.
-
[1] MEZA J, CONTRERAS-ORTIZ S H, PEREZ L A R, et al. Three-dimensional multimodal medical imaging system based on freehand ultrasound and structured light[J]. Optical Engineering, 2021, 60(5): 054106. [2] HE H H, YUAN J J, HE J Z, et al. Measurement of 3D shape of cable sealing layer based on structured light binocular vision[J]. Proceedings of SPIE, 2021, 11781: 117811L. [3] SUN C R, ZHANG X Y. Real-time subtraction-based calibration methods for deformation measurement using structured light techniques[J]. Applied Optics, 2019, 58(28): 7727-7732. doi: 10.1364/AO.58.007727 [4] XU M, LU X X, HUANG H M, et al. Dual surface structured light vision system based on multidimensional parameter coding[J]. Applied Optics, 2019, 58(26): 7212-7221. doi: 10.1364/AO.58.007212 [5] CAO ZH R, JIANG H B. Encoding technology of an asymmetric combined structured light for 3D measurement[J]. Applied Optics, 2020, 59(33): 10253-10263. doi: 10.1364/AO.400307 [6] HA M, XIAO CH Y, PHAM D, et al. Complete grid pattern decoding method for a one-shot structured light system[J]. Applied Optics, 2020, 59(9): 2674-2685. doi: 10.1364/AO.381149 [7] ELAHI A, LU J, ZHU Q D, et al. A single-shot, pixel encoded 3D measurement technique for structure light[J]. IEEE Access, 2020, 8: 127254-127271. doi: 10.1109/ACCESS.2020.3009025 [8] YE W ZH, ZHONG X P, DENG Y L. 3D measurement using a binocular cameras-projector system with only one shot[C]. 2019 3rd International Conference on Electronic Information Technology and Computer Engineering (EITCE), IEEE, 2019. [9] HUANG X Y, ZHANG Y Y, XIONG ZH W. High-speed structured light based 3D scanning using an event camera[J]. Optics Express, 2021, 29(22): 35864-35876. doi: 10.1364/OE.437944 [10] LYU C Y, LI P, WANG D CH, et al. High-speed optical 3D measurement sensor for industrial application[J]. IEEE Sensors Journal, 2021, 21(10): 11253-11261. doi: 10.1109/JSEN.2020.3006566 [11] ZHANG S. High-speed 3D shape measurement with structured light methods: A review[J]. Optics and Lasers in Engineering, 2018, 106: 119-131. [12] GAO H, TAKAKI T, ISHII I. GPU-based real-time structured light 3D scanner at 500 fps[J]. Proceedings of SPIE, 2012, 8437: 84370J. doi: 10.1117/12.922568 [13] LIU Y J, GAO H, GU Q Y, et al. . A fast 3-D shape measurement method for moving object[C]. 2014 IEEE International Conference on Progress in Informatics and Computing, IEEE, 2014. [14] WEISE T, LEIBE B, VAN GOOL L. Fast 3D scanning with automatic motion compensation[C]. 2007 IEEE Conference on Computer Vision and Pattern Recognition, IEEE, 2007. [15] CONG P Y, XIONG ZH W, ZHANG Y Y, et al. Accurate dynamic 3D sensing with Fourier-assisted phase shifting[J]. IEEE Journal of Selected Topics in Signal Processing, 2015, 9(3): 396-408. doi: 10.1109/JSTSP.2014.2378217 [16] QIAN K M, WANG H X, GAO W J. Windowed Fourier transform for fringe pattern analysis: theoretical analyses[J]. Applied Optics, 2008, 47(29): 5408-5419. doi: 10.1364/AO.47.005408 [17] STOILOV G, DRAGOSTINOW T. Phase stepping interferometry: Five-frame algorithm with an arbitrary step[J]. Optics and Lasers in Engineering, 1997, 28(1): 61-69. doi: 10.1016/S0143-8166(96)00048-6 [18] GREIVENKAMP J E. Generalized data reduction for heterodyne interferometry[J]. Optical Engineering, 1984, 23(4): 234350. [19] WANG ZH Y, HAN B. Advanced iterative algorithm for phase extraction of randomly phase-shifted interferograms[J]. Optics Letters, 2004, 29(14): 1671-1673. doi: 10.1364/OL.29.001671 [20] LI J, GUAN J T, DU H, et al. Error self-correction method for phase jump in multi-frequency phase-shifting structured light[J]. Applied Optics, 2021, 60(4): 949-958. doi: 10.1364/AO.413506 [21] YANG D, QIAO D Y, XIA CH F. Curved light surface model for calibration of a structured light 3D modeling system based on striped patterns[J]. Optics Express, 2020, 28(22): 33240-33253. doi: 10.1364/OE.408444 [22] WANG SH SH, LIANG J, LI X, et al. A calibration method on 3D measurement based on structured-light with single camera[J]. Proceedings of SPIE, 2020, 11434: 114341H. [23] MARRUGO A, VARGAS R, ZHANG S, et al. Hybrid calibration method for improving 3D measurement accuracy of structured light systems[J]. Proceedings of SPIE, 2020, 11490: 1149008. [24] ZHANG ZH Y. A flexible new technique for camera calibration[J]. IEEE Transactions on Pattern Analysis and Machine Intelligence, 2000, 22(11): 1330-1334. doi: 10.1109/34.888718 [25] HAN J, XU C P, ZHANG CH L, et al. An algorithm combining the branch-cut method and rhombus phase unwrapping algorithm[J]. Journal of Physics:Conference Series, 2020, 1634: 012068. doi: 10.1088/1742-6596/1634/1/012068 [26] DU G L, WANG M M, ZHOU C L, et al. A simple spatial domain algorithm to increase the residues of wrapped phase maps[J]. Journal of Modern Optics, 2017, 64(3): 231-237. doi: 10.1080/09500340.2016.1229502 [27] LIU X R, KOFMAN J. Real-time 3D surface-shape measurement using background-modulated modified Fourier transform profilometry with geometry-constraint[J]. Optics and Lasers in Engineering, 2019, 115: 217-224. doi: 10.1016/j.optlaseng.2018.11.014 -


 下载:
下载:
